Accessing the Setup Trackers Screen
From the front screen of Prohire select Tracker > Setup Trackers
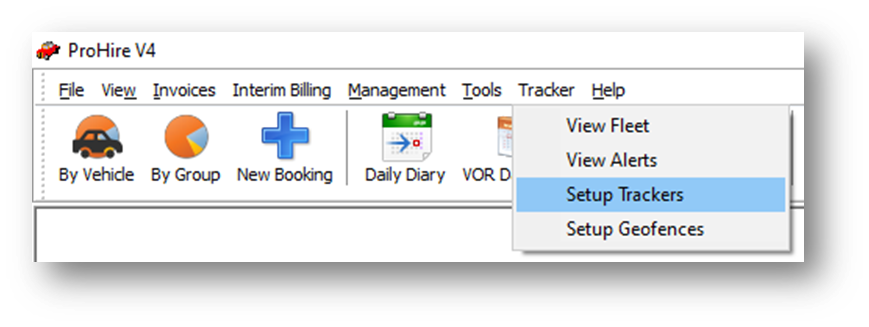
The Setup Trackers screen will then appear.
Fitting/Allocating Tracker to Vehicle
Select the car icon next to the tracker you wish to fit.
- It’s possible to fit trackers that are in the ‘Available’ or ‘Removed’ status.
A window will appear asking if the tracker has already been fitted to a vehicle.
Yes – Select this to specify which vehicle the tracker has been fitted to.
No – Select this to specify your intent to fit this tracker to a vehicle.
If you selected ‘Yes’, the following window will appear.
Find Vehicle –Type in the reg of the vehicle you wish to fit the tracker to and select it.
Who fitted the tracker? – Select who fitted the tracker from the list of Prohire users.
Date/Time fitted – Enter the date and time the tracker was fitted
Notes – Enter any additional information
Please note that only the find vehicle information is required to mark the tracker as fitted. The other fields are optional.
Once fitted the tracker will display as below.
You can view the Device History page by selecting the ‘View History Button’
The ‘Invalid GPS Fix’ error message will disappear, and the tracker should start to update once the vehicle has been taken on short journey. If the tracker still displays an error after a drive, please contact the help desk.
If you selected ‘No’ the following window will appear.
Find Vehicle –Type in the reg of the vehicle you wish to fit the tracker to and select it.
Job assignee – Select who will fit the tracker from the list of Prohire users.
Due Date/Tiem – Specify when this is due to be completed.
Notes – Enter any additional information
Select Create Job – This will create a mobile job that’s assigned to the selected user.
If you select ‘Scheduled Job’ the below will appear.
Scheduled – Specify the date and time you plan for the job to be available.
Due – Specify the deadline for the job.
Select ‘Create Job’ or ‘Schedule Job’ once happy.
The tracker will then display as below. This will update to fitted/Available based on if the mobile job is completed/cancelled.
On the allocation chart you will also see that a tracker is fitted to REG02 due to the ‘Y’ in the Trk column.