To access the quick setup tabs from prohire you will need to follow the below steps
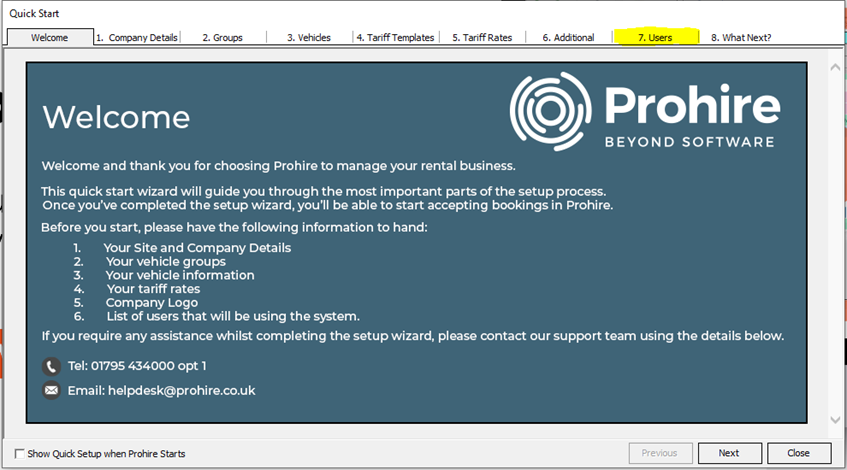
Click on the “Tools” button at the top of the page then click “setup” in the drop down and finally click “Quick setup”. Your screen should look like mine when you come to the final step
Once you have clicked on quick setup you will be presented with the below screen.
Each tab contains different features for prohire but the only one we need right now is number 7 the “Users” tab. As you can see above, I have highlighted this tab in yellow. Click on the Users tab and you will be presented with the below screen.
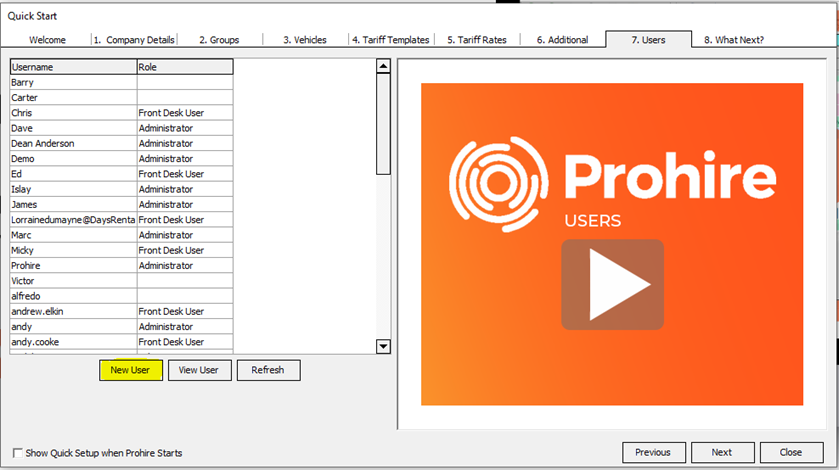
This tab is used to create and manage all prohire users. All users will show here even if they are old or deactivated as this allows you to reactivate users if you need to. The function we need right now is the “New user” button which I have highlighted in yellow. Once you have clicked the “New user” button you will be presented with the user creation screen like below.

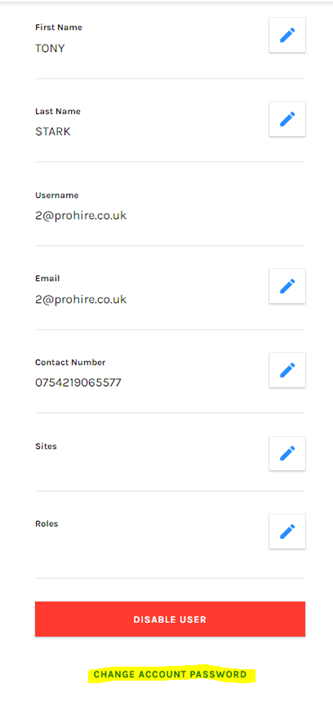
This is where you will be inputting the details for your new user. As you can see the first 3 boxes have a red border and this is because they are mandatory fields. The other fields are not mandatory, but you may find it useful to populate this information so that you can easily find the user's email or number in the future.
The site drop-down is not mandatory but is very useful if you have more than 1 site. In the example below I have several sites, so I am going to select the Sittingbourne site. The reason you would select a site is so that your new user only has access to the sites that are selected and will not be able to log in to the sites that have not been selected. This can be changed at any time. If no sites are selected the user will automatically have access to all sites.

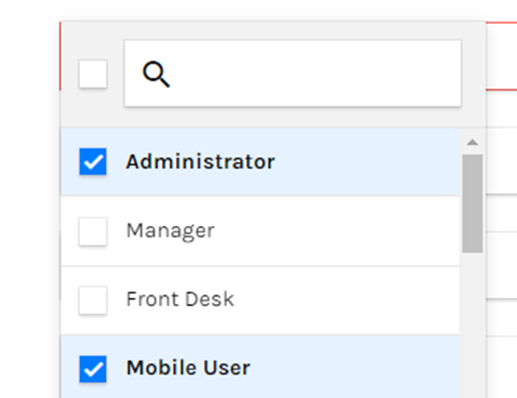
Finally, we have the role drop-down. This drop-down is used to determine what level of access you would like your users to have. There are 4 standard roles below. The “mobile user” role is selected when you would like your user to have access to our companion app (click on the following link for more information on companion Prohire Mobile | Prohire Software Systems Ltd) and this is the only non custom role that should be selected as well as other roles. The “front desk user” role is the lowest level of access and will allow the user to perform all basic tasks, but they will not have access to any of the Prohire settings. The “manager” role is the middle level and allows for more control over the system but is still restricted when it comes to the more intricate settings. The “administrator” role has full privileges and allows the user to make any changes and perform any task on Prohire. only 1 role should be selected excluding the “Mobile user” role.
Once you are happy with the details you have entered you will need to click the “create user” button like below.

Once the user has been created it will automatically set the password as the users full name. when this password is entered the first time you log in to prohire you will be given the opportunity to change it. The other way to change the password is to use the change password button on the bottom of the page. Please see below for my example.