The first to do is to download a folder that we will need to use later on for the posting configuration setup. To do this, make your way through ‘help’ at the top of the front screen of Prohire and then ‘Video Tutorials’.
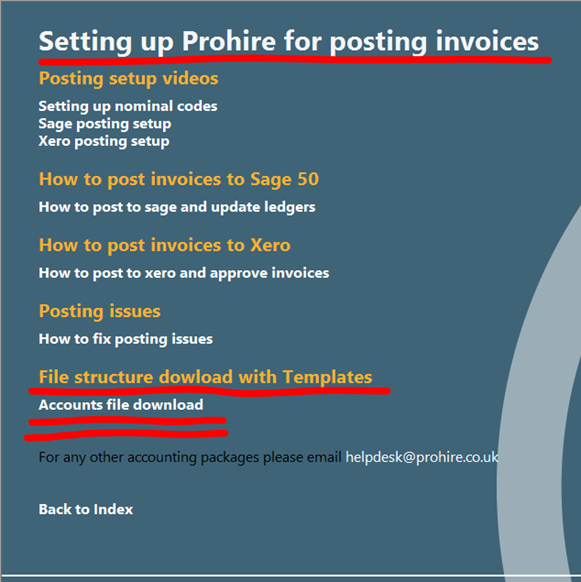
In here, you will need to scroll down until you find the link that will initiate the download that we will need for later on in the guide. The location of this can be seen below:
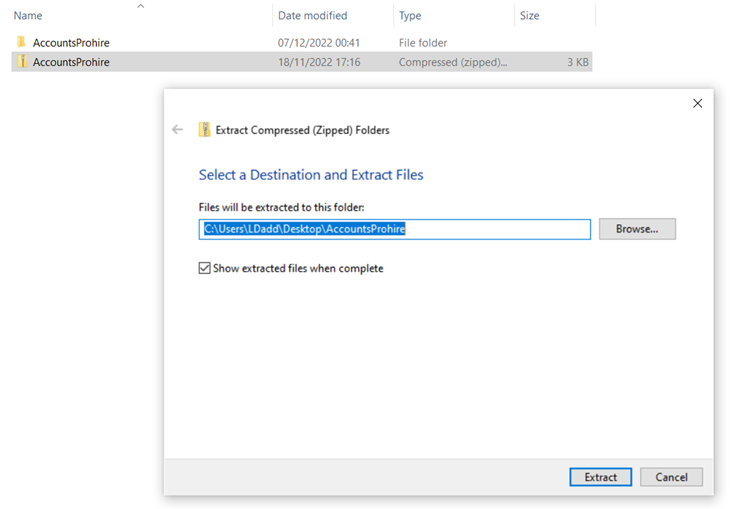
As this is a zip folder, you will need to unzip this and relocate the folder. To unzip the folder, simply right-click on the zip folder and select ‘Extract All’ as seen below:

This will then take you to the screen below where you can choose where to put this unzipped version of the folder. Your documents is the best location for this.
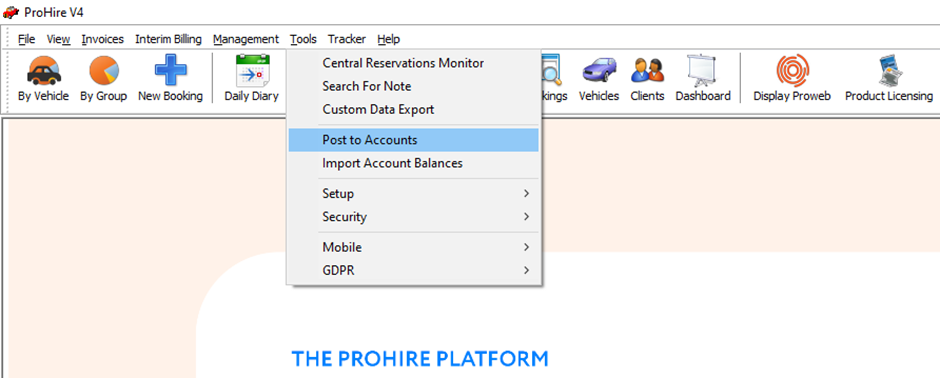
- From the front screen of Prohire click on Tools => Post to Accounts.
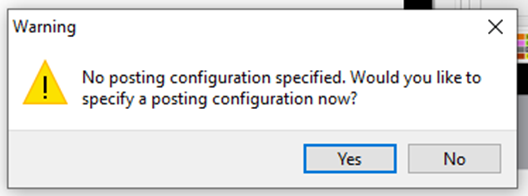
- The first time you click on this menu option a dialog box will appear asking if you would like to set up a posting configuration now, click Yes to set up the link.
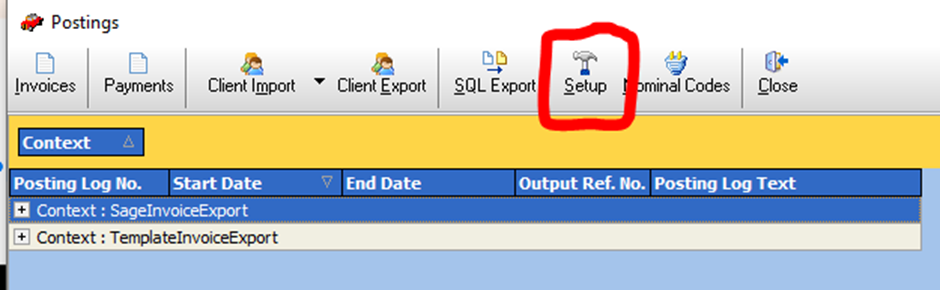
You might also get the message if Prohire has lost the link. Regardless, select setup from the top of the screen as seen below.
- After you click Yes, a new window called Posting Configuration Selection will come up, at this point you will want to select the 3 dots button ‘…’ which will prompt you to browse to the posting configuration ‘.pc’ which we downloaded earlier from the video tutorials under ‘help’.
This is the posting configuration complete; the following points are advanced options should you need to change them.
Press Editor to open the Posting Configuration Editor screen.

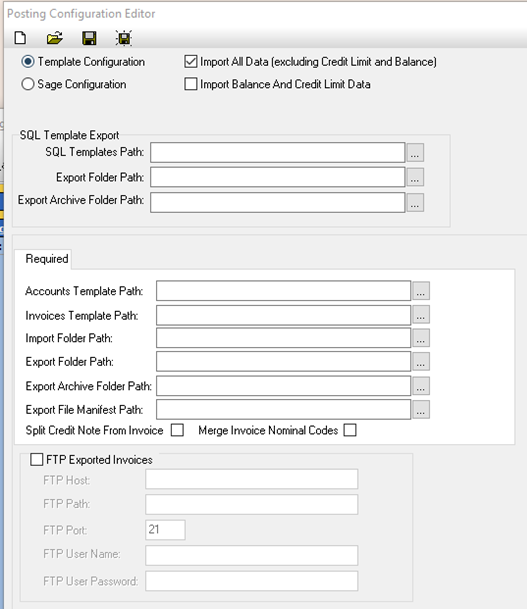
The screen above will appear and it will show all of the required fields as filled in as these will have pulled through from the posting configuration we browsed to previously.
Advanced Options:
Below is some further information into each of these needed paths which may prove useful to you to find them to enter in the relevant field(s).
- In the Import Folder Path field browse to the folder location on your system where you want the imported invoice .csv file to be stored, the best place for this is within the Import folder of the Accounts File download zip folder you downloaded from the video tutorials above.
- In the Export Folder Path field browse to the folder location on your system where you want the exported invoice .csv file to be stored, the best place for this is within the Export folder of the Accounts File download zip folder you downloaded from the video tutorials above.
- In the Archive Folder Path field browse to the folder location on your system where you want the archived invoiced .csv files to be stored, the best place for this is within the Archive folder of the Accounts File download zip folder you downloaded from the video tutorials above.
- Now that you have completed all the necessary fields, click Save and give the file a name. By default it will be saved into your My Documents folder but you can change this if you wish, just make a note of where you saved it because you will need to browse to it shortly.
- Having saved your new configuration file, Close the window and click on the Browse button (button with 3 little dots in it) and select the file you created in the previous step.
- In the field Default posting configuration file you will now see the destination path where your configuration file is stored, click OK to confirm the changes you have made or Cancel to exit.