This document will show you how to set up the ‘Details’ tab within the Proweb setup.
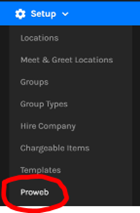
1. First you will need to navigate to the POL Setup Screens which can be accessed as per the below:-
- Tools > Setup > Display POL Setup
- Tools > Setup > Display POL Setup


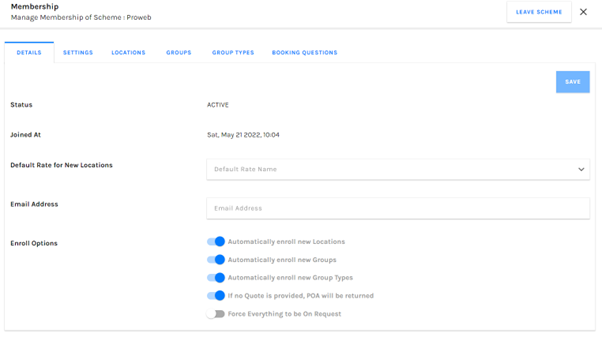
4. The ‘Status’ field confirms if the Proweb scheme is ACTIVE or DISABLED. Disabled Proweb schemes will not allow customers to book online if the widget is present on your website.
The ‘Joined At’ field will show you the date that you joined and/or created the Proweb scheme.

5. Below this you have the ability to configure which Rate Card is used by default for new locations, and the option to enter an email address which will be Bcc’d into any correspondence sent using the Proweb platform.

6. Enroll Options – You also have the below enroll options which can be enabled/disabled:

a. Automatically enroll new Locations – This toggle will enroll newly created Locations to the Proweb system when they are created if this is enabled.
b. Automatically enroll new Groups – This toggle will enroll newly created Groups to the Proweb system when they are created if this is enabled.
c. Automatically enroll new Group Types - This toggle will enroll newly created Group Types to the Proweb system when they are created if this is enabled.
d. If no Quote is provided, POA will be returned – This setting will display POA (Price on Application) to your customers if the system cannot provide a quote (due to no prices being entered or no availability etc).
e. Force Everything to be On Request – This will force all Proweb bookings to be On Request irrespective of their availability. This will mean that you will manually need to accept/reject Proweb bookings as opposed to using the Availability Engine.