Accessing R.A. & Invoices Configuration
From the front screen of Prohire select Tools > Setup > System Setup

Once the Setup screen appears select ‘R.A. & Invoices'.
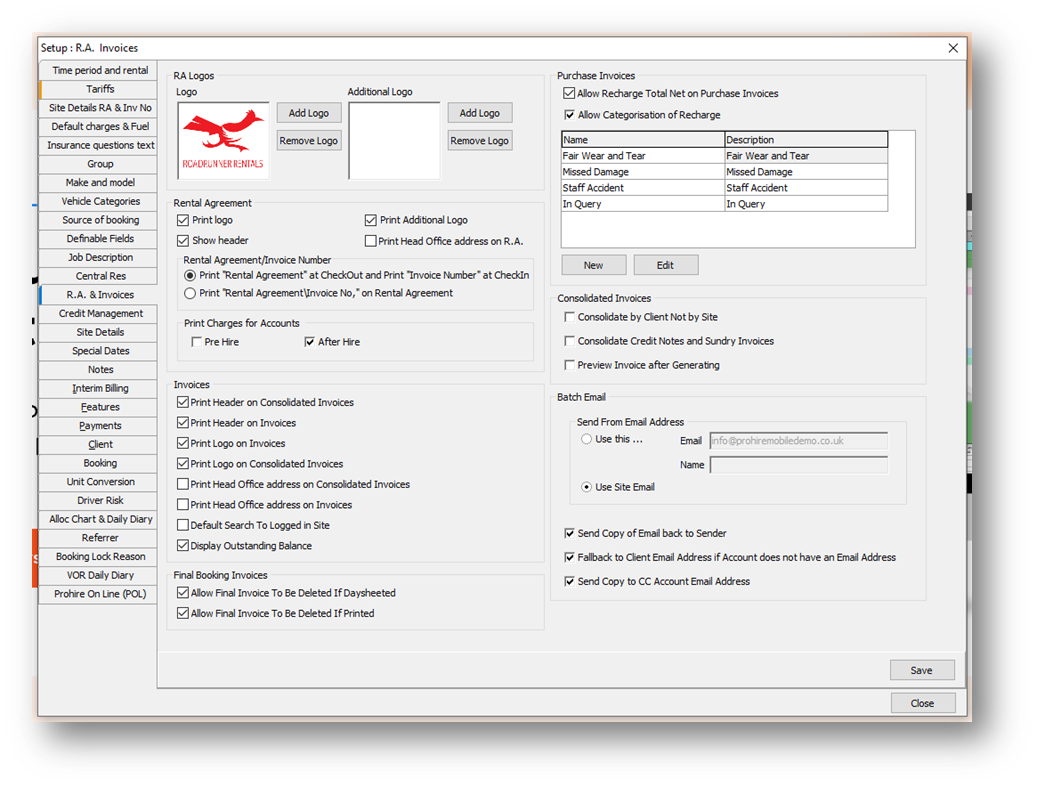
R.A. & Invoices Setup
Logo

Logo: A company logo can be placed in the top left-hand corner of the rental agreement. To put your own logo on the rental agreement, click the Add button which will show the Open dialog box this will enable you to browse to the image.
- The image must be in bitmap (bmp) format. You don’t need to be too concerned about the proportions of the image since it is automatically sized on the rental agreement. However, logos that have proportions like a widescreen television will be displayed more effectively.
Additional logo: This can be used to place an additional logo on the rental agreement, e.g. BVRLA logo.
- You must ensure that you are a member of the relevant organisation and have permission in writing before using any such logo.
Click Remove Logo if a logo that has been added needs to be removed / deleted.
Rental Agreement

Print Logo: Tick this box if you want the logo to be printed or un-tick if you do not want the logo to be printed.
Show Header: Un-tick this box if you have pre-printed rental agreement paper which holds your Company Address’ details. Ticking this box will print the address details that Prohire holds.
Print Additional Logo: Tick this box if you want the additional logo to be printed or un-tick if you do not want the additional logo to be printed.
Print Head Office Address on RA: Tick this box if you wish to have your Head Office address to always print on your Rental agreements rather than the originating sites address.
- This option is only valid if you have multiple sites.
Rental Agreement / Invoice Number: Select which option is best suited to your business needs.
Invoices

Print header on Consolidated Invoices: Tick this box if you wish your Site Details to be printed on your Consolidated Invoices.
Print Header on Invoices: Tick this box if you wish your Site Details to be printed on your Invoices or un-tick the box if you are going to be using Pre-Printed Invoice paper.
Print logo on Invoices: Tick this box if you want your logo to be printed or un-tick if you do not want your logo to be printed.
Print logo on Consolidated Invoices: Tick this box if you wish your Site Details to be printed on your Consolidated Invoices.
Print Head Office address on Invoice: If you have more than 1 site and you wish all Invoices to be printed with your Head Office address rather than their site address tick this box.
Print Head Office address on Consolidated Invoices: If you have more than 1 site and you wish all Consolidated Invoices to be printed with your Head Office address rather than their site address tick this box.
Default Search To Logged In Site: throughout Prohire there are a number of Site search boxes that by default are set to “All”, so any search will be performed across all sites. However, when this option is enabled this site search boxes will default to only searching on the site you have logged into.
Display Outstanding Balances: with this option enabled a new column will appear on the Invoice & Billing tab in the booking screen to allow you to quickly see if a generated invoice has an outstanding balance.
Final Booking Invoices

The two tick boxes for Final Booking Invoices have hard coded audit points on them as these allow the users to back up booking and delete invoices that could have been made public, i.e. printed and/or day sheeted. This has the potential for fraud to be undertaken.
Allow Final Invoice to be deleted if daysheeted: Tick this box if you wish to be able to back up a Checked In booking that has had its final invoice put onto a daysheet.
Allow Final Invoice to be deleted if Printed: Tick this box if you wish to be able to back up a Checked In booking that has had its final invoice printed.
- To determine if a final invoice has been printed or daysheet, in the main Booking/ Rental screen, click on the tab INV and you will see an invoice which will tell you if it has been Printed and/ or daysheeted. The final invoice will always be generated as soon as the booking has been Checked In.
Purchase Invoices

Allow Recharge Total Net on Purchase Invoices: this option activates an additional field on Sunday Purchase Invoices and Sundry Purchase Credit Notes that allows you to record a recharge net value against each item that you have added. This information Does Not print on the invoice report.
Allow Categorisation of Recharge: once activated this option allows to you assign a pre-created category to an item you have included on a Purchase Invoice or Credit Note. Use the “New” and “Edit” buttons below the grid to create new or amend the existing Recharge categories.
Consolidated Invoices

Consolidate by Client Not by Site: when consolidating invoices the default behaviour in Prohire is to create a Consolidated Invoice for each location the client had invoices from. When this option is selected that behaviour is overridden, instead the system will create 1 Consolidated Invoice containing all the invoices that client had irrespective of the site where the invoice was generated.
Consolidated Credit Notes and Sundry Invoices: when this option is selected the system will allow you to consolidate all invoice types created for this client rather than just the usual Sales Invoices, which the system will do be default.
Preview Invoice after Generating: when this option is enabled a preview of the consolidated invoice you have just generated will be presented allowing you to immediately print it. If this option is not enabled however you will need to find this invoice from either client record or from the List Invoice screen.
Batch Emailing

This group of settings allow you to configure the batch emailing feature in the system in terms of what email addresses to use and who to email.
Send from Email Address: this option allows you to specify what sending address to use on the emails sent to your customers. You can either use a global address on your emails for all sites or you can choose to have the site’s email address used.
Send Copy of Email back to Sender: with this option enabled a copy of the email sent to the customer will also be sent to the email address of the sender, so either the global email address or the site’s email address
Fallback to Client Email Address if Account does not have an Email Address: when this option is enabled the system will use the client’s contact email if the no account email address is found. This setting will allow you to email both account and non-account customers when it’s enabled.
Send Copy to CC Account Email Address: this option allows you to also email the account’s CC address at the same time as using the account’s main email.