Finding your tariff templates
It's possible to find the tariff templates from two locations.
1) Tools > Setup > Quick Setup > 4. Tariff Template 
2) Tools > Setup > Tariff Templates 

By default, Prohire will have a Monthly and Retail template which you can update to meet your business needs.
Creating new tariff templates
To create a new template, select ‘New Template’.
Via Quick Setup

Via Setup > Tariff Templates

The Tariff Template screen will then appear. This screen has 3 tabs running along the top, Template Details, Tariff Charges, Tariff Periods.
Tariff Details

- Display Name – This Mandatory field is where you will enter a short name you will use for this template.
- Description – Type in a more detailed description of the Tariff Template.
- Specific Period Priority – Specify in what order you want the system to look at your specific periods.
- Exact Match for Fixed Period when using Extra Days – Select this if you wish the charge details to show a combination of charge periods in the charge details (2 Weeks & 3 Days rather than 17 days) for combo tariffs.
Tariff Charges
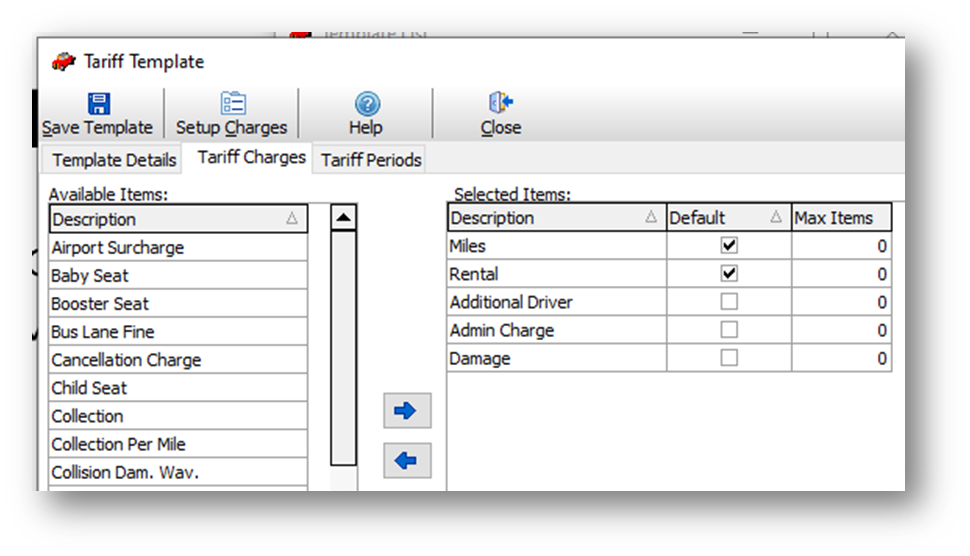
This screen is to setup all the charge items that you want to be able to charge the customer on their rental agreement. Any Item that is not selected will not be able to be included in the clients’ rental.
- Available Items – This is a list of all the charge items on your system that have not been moved over to the right side (Selected Items). To move an item across, highlight it and then click the right pointing button. The Fuel and rental COI items must not be moved across as the system will automatically use them when required.
- Selected Items – These are all the chargeable items that a front desk user can add to a clients’ rental.
- Max Items – This is a legacy feature for Prohire which is no longer in use.
Tariff Periods
The Tariff Periods tab is where you can specify the charge periods on to which you will then enter your rates.

![]() Click to create a new Tariff Period
Click to create a new Tariff Period
![]() Click to remove an existing Tariff Period
Click to remove an existing Tariff Period
![]() Click to edit the currently highlighted Tariff Period
Click to edit the currently highlighted Tariff Period
Clicking the plus icon will open the Tariff Period Details screen where you can enter the information regarding to the period being created.

- Description – Enter in a description of this period, generally this will be the period this will cover (1 – 5 Days).
- Unit Type – Select the type of period that corresponds to the type of rate you will be entering in. The types of period units are:
- Hours – If you wish to charge for ½ day hires or 6 hours select this option
- Days – If you wish to charge for the number of days hired select this option
- Months – If you wish to charge for a whole month select this option
- Specific – This is used if you wish to specify special days, times of day/times you will charge for Eg weekend hires etc.
- Extra Days – This is used when setting up combo tariffs. This period type will allow you to specify a price that the system must use for bookings that go over 7 days in length.
- Upto – The maximum amount of time this period will be used for. If you specify the unit type ‘Specific’ this field is not available, and you will need to either specify a set of Days, Times or Day/Times instead.
You must always have a final period that has a Upto of 999 as a catch all in the case of a rental being extended beyond normal booking lengths.
If you specify the Months unit type you will not use any other periods on the Tariff Template.
When the unit type Specific is selected the Days Valid and time Valid options become available.

You will need to select either one or both of these tick boxes depending on what type of specific period you want.
- Days Valid – Having ticked the box specify the day of the week you wish the period to start from and end on.
- Time Valid – Having ticked the box specify the start and end time for this period.
You can specify both in which case you will need to enter both a Start Date & Time and an End Date & Time.
Once you have entered in all you Tariff Charges and Tariff Periods, click Save Template to retain all changes, or select Close to exit without saving your changes.