The first thing you will need to do is follow the steps below.
Tools>Post to accounts > Setup > Editor

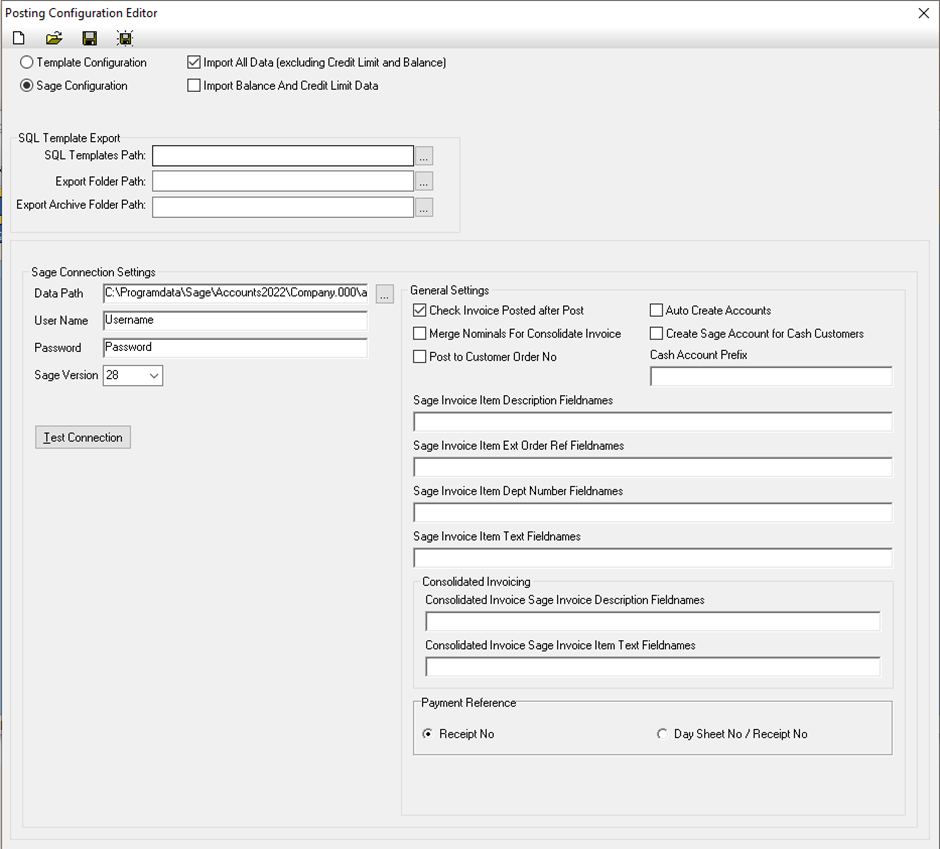
From here you will need to select the sage configuration option in the top right. You will also need to enter the username and password for sage so prohire is able to connect.
You will also need to enter the data path that can be found under “Help” and “About” in sage. This path can also be found on the login screen of sage like below.
You will also need to make sure that you specify how to reference payments in sage. This can be done on the bottom right. As you can see, I have selected the “receipt number” option.

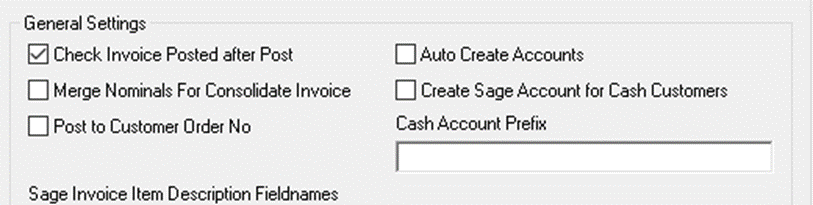
We also Recommend that the “Check invoice Posted after Post” tick box is ticked. This essentially means that prohire will check with sage after the invoices have been posted to make sure that they have all gone over successfully.
If you would like to know more about what the other fields do, I have included a link below to another one of our articles that explains each field in detail.
Sage Invoice Posting – Advanced Setup (prohire.co.uk)
Once all fields are filled in your screen should look like the below.
Once you are happy that all the details are correct you may want to click the “test connection” button to make sure the connection is successful. Please note: if sage is running prohire can’t connect so you may get an error saying username already in use. If this happens just close sage and test again.
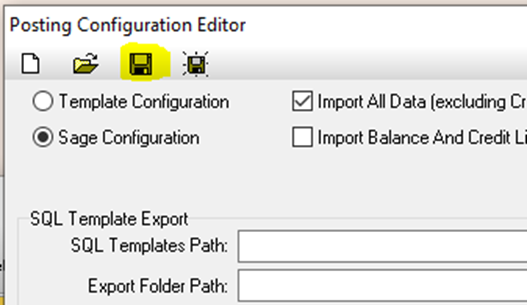
Once the connection is successful you will need to click the save button in the top right corner and save the configuration somewhere that you can find it.
Once saved you will need to close out of this screen and click on the 3 dots to the right of the configuration data path.

Now navigate to where you saved the file and click open. Once done click on ok on the configuration panel so that your changes are saved. Once you have done this you will be ready to begin posting.
